Even the best handcrafted wooden toboggans require small modifications and repairs. From refurbishing the finish to replacing tired and loosened ropes, we have proven, centuries-old tips that take just a few minutes.
Set aside a day or two during the off-season to get your wooden toboggan in tip-top shape. Before you know it, the snow will be flying, and you’ll be pulling your trusted sled or toboggan behind you once again.
Start your wooden toboggan and sled repairs with these artisan tips:
Freshen Up the Finish
After a few years of soaring down sledding hills or being drug through the rugged wild, your toboggan’s color will begin to fade. Even more, the coat preserving that precious handcrafted red oak wears away.
The process we use to freshen-up sleds in the workshop and at home is fast, simple, and rooted in centuries-old traditions. To start this short project, you’ll need:
- 4 parts boiled linseed oil
- 1 part cedar oil stain
- Brush or roller
- Clean rag
- 100-150 grit sandpaper
- Disposable latex gloves
Start by lightly sanding the toboggan using fine sandpaper. This will help remove dirt and stains while opening up the grain of the wood. Now it’s ready for a fresh coat of boiled linseed oil.
Mix the boiled linseed oil and cedar oil stain in a container. Apply a thin coat of the mixture with your brush or roller to all wooden surfaces. About 10 to 15 minutes after applying, wipe the surface to remove any excess oil. This process can be followed for all surfaces of the toboggan. Your toboggan should now look alive again.
CAUTION: IF YOU USE LINSEED OIL IN ANY FORM, DISPOSE OF ANY RAGS OR PAPER TOWELS USED TO WIPE DOWN YOUR SLED OR FOR CLEAN UP. LINSEED OIL CONTAINS PROPERTIES THAT SPONTANEOUSLY COMBUST.
Some older toboggans might need a glossier refinishing depending on the original finish. For this, we'd recommend sanding the surface of your sled and applying 3 coats of Exterior Oil-Based Clear Spar Varnish or Polyurethane for best protection.
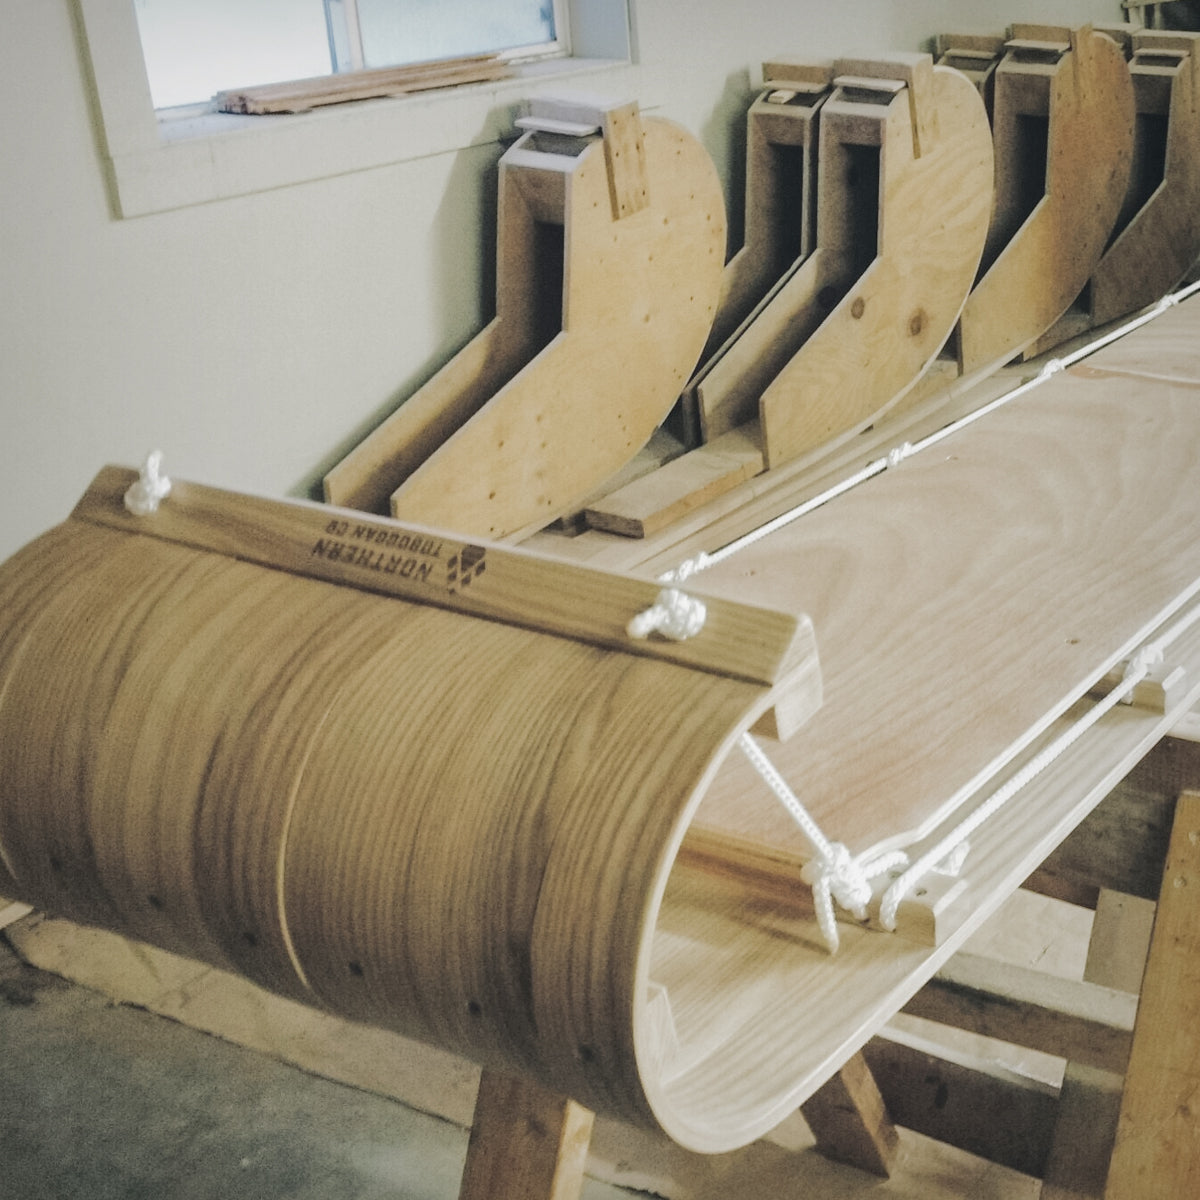
Replace Your Toboggan Rope
Toboggan ropes naturally loosen or stretch overtime. Re-tightening the tie around rope is important for maintaining the effectiveness of your sled or toboggan and keeping you and your family safe.
Here are the steps we take to re-tighten our toboggan ropes:
Step 1 - Tie the rope on the left side of the first crosspiece behind the curl. One end of the rope is threaded from the front through the first crosspiece and knotted on the backside of the crosspiece.
The other end and the rest of the rope is taken over the top and back over the top of the second crosspiece. Then, it’s threaded back through the second crosspiece (right to left) and all the rope is pulled through and coiled.
Step 2 - Next, the coiled rope goes over the top of itself between the crosspieces and back out underneath making a loop around the rope between the crosspieces. Then, take it back over the top of the crosspiece and back over the top of the third crosspiece and thread it back towards the front, coiled and over the top and back out underneath. Keep moving on to the next just like that around the toboggan.
Step 3 - When you get around to the right side of the first crosspiece behind the curl, the rope goes over the top and back through the crosspiece and is left there until the rope is tightened. When tightening the tie-around rope, a larger and wider plier is better than a smaller, narrower plier.
Starting at the front side of the second crosspiece from the curl on the left side of the toboggan, grab the rope where it comes out of the crosspiece. With a good grip on the rope, work it slightly to get it moving and then tighten it up by prying against the crosspiece. While the plier is holding the rope tight, use the index finger on your left hand to pinch it against the crosspiece so when you release the grip it will stay tight.
While holding the rope pinched against the crosspiece, grab the rope on the other side of the crosspiece and pry the knot tight on top. Before releasing the plier grip, pinch the rope between the pliers and the knot to hold it tight with the left hand. Move the pliers to the next crosspiece and repeat the process. The right hand controls the pliers, and the left hand pinches the rope to hold the tension in the rope.
Step 4 - When you get around to the right side of the first crosspiece, grab the rope with the pliers where it exits the crosspiece and pry it tight, pinch it with your left hand, and loop the loose end over and underneath the rope. Then grab it with the pliers again and pull it tight.
Now, pinch it with your left hand before releasing the pliers and finish tying the multiple half hitches by hand. After the knot is tied, the loose end of the rope can be held out of the way by fastening it to the tie-around rope with a plastic cable tie or tape.
To learn more about caring for your wooden toboggan or sled, visit our Sled Maker’s Journal blog.